Product Documentation:
1. Download your basic manual for operations
1. Download your basic manual for operations
| vivalign-manual-_free_from_site-_corrections_2019.pdf |
2. Follow these steps
Basic Operation
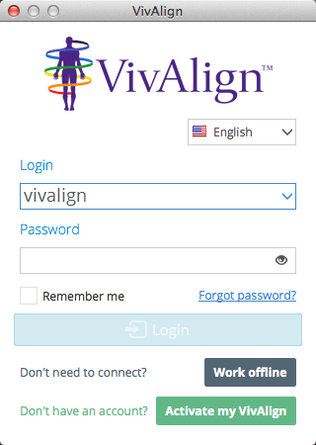
Click the VivAlign™ software shortcut, or find and click VivAlign™ .exe to launch the software directly. The Login window appears (Fig.1).
Basic Operation
Click the VivAlign™ software shortcut, or find and click VivAlign™ .exe to launch the software directly. The Login window appears (Fig.1).
For standard online operation (connected to the Internet), enter the subscription Login (username) and Password and click Login. Note: Each VivAlign™ device requires its own separate subscription account (Login/Password). Attempting to connect multiple devices to a single subscription will result in the inability to log into the subscription.
For offline operation (not connected to the Internet), choose the Language and click Work offline.
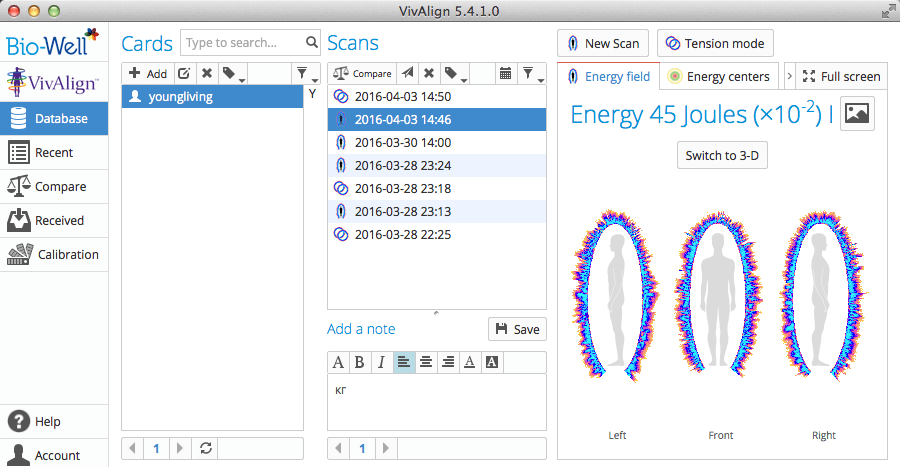
Once logged in, the main window will appear. This dashboard-style layout provides access to all software functions and scan history.
For offline operation (not connected to the Internet), choose the Language and click Work offline.
Once logged in, the main window will appear. This dashboard-style layout provides access to all software functions and scan history.
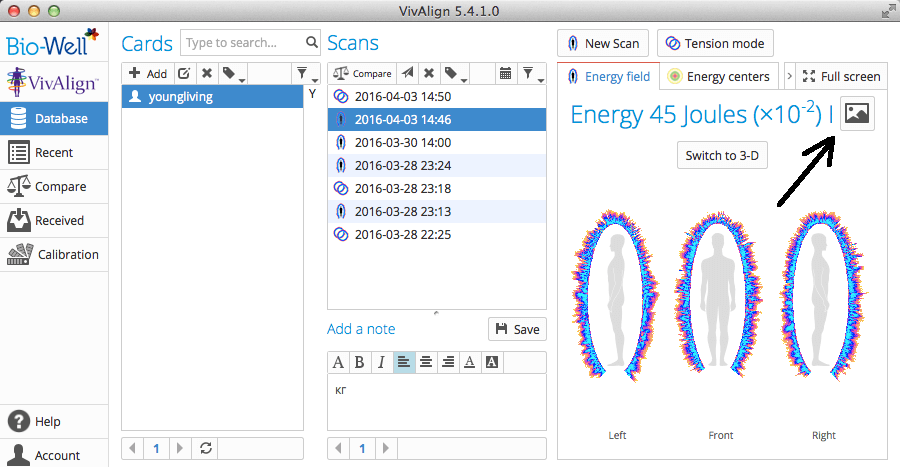
Every screen of the program may be saved as picture by clicking the
Screenshot button located at the upper-right of the main window.
To conduct a scan, a Card must first be created by clicking the Add button. Name, Gender and Birthdate are required. Adding a picture and other information is optional. All data will be kept in the online Database associated with the subscription account. For those users who prefer or require a high degree of privacy for their clients, consider using numeric or alphanumeric identification instead of actual names.
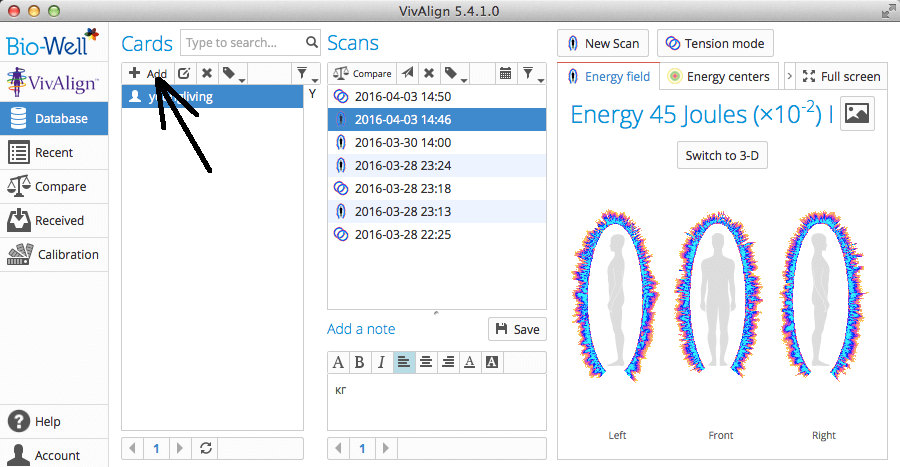
The Database is searchable by name. Cards are listed alphabetically in the Cards column, and may be edited or deleted.
Multiple Cards may be grouped together by creating Labels. Click on a Card, then click the Label button to assign a label name and color. The labeled Cards will now appear with their assigned color within the Card column, and may be seen together by using the Filter to display the particular label.
Multiple Cards may be grouped together by creating Labels. Click on a Card, then click the Label button to assign a label name and color. The labeled Cards will now appear with their assigned color within the Card column, and may be seen together by using the Filter to display the particular label.
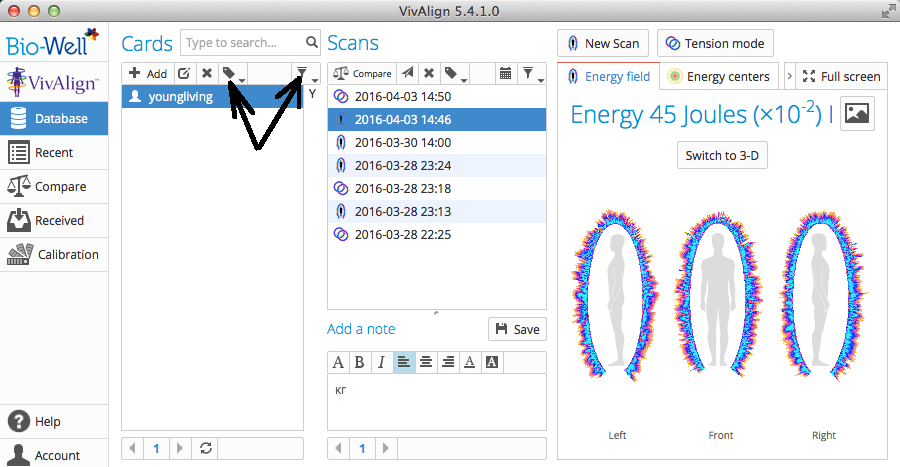
At the bottom of the Cards column, SCROLL arrows are available to navigate the entire list of Cards.
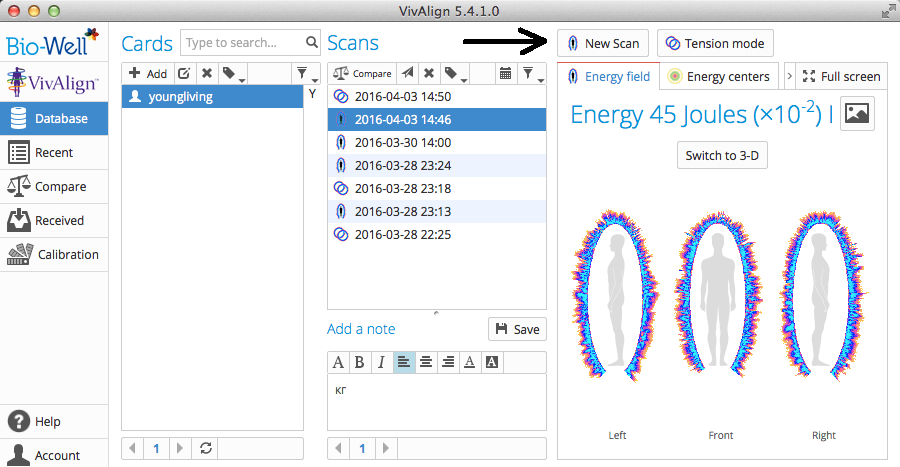
New Scan Mode
With the VivAlign™ device connected to the computer, choose a Card and click New Scan to enable the 10-finger interface
New Scan Mode
With the VivAlign™ device connected to the computer, choose a Card and click New Scan to enable the 10-finger interface
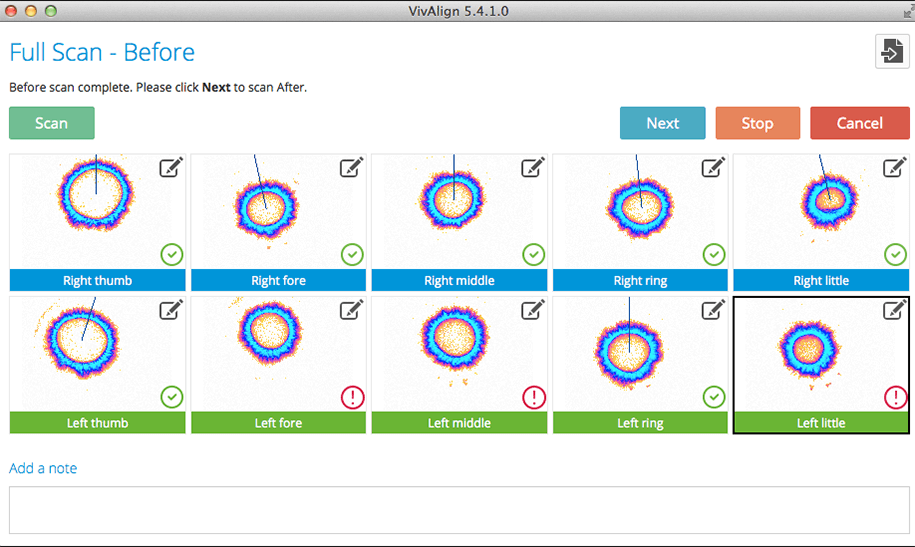
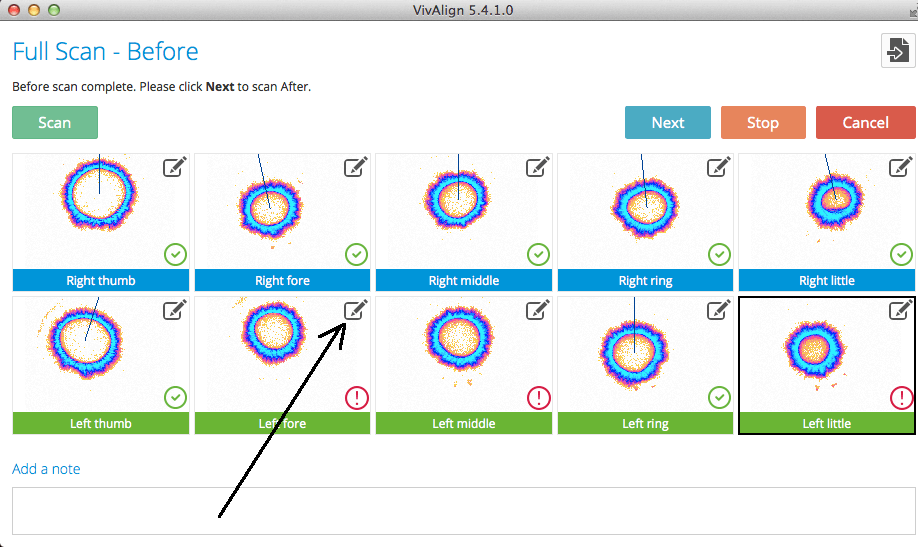
Scan: Thoroughly wash your hands making sure fingers and fingernails are clean to avoid getting any dirt or bacteria on the camera lens, dry them and wait for 10 min before conducting the scan. Click Scan (or press Spacebar) to initiate a capture of each finger, one-by-one, starting with the Right Thumb.

Then place one finger at a time in the VivAlign box with the
fingertip lightly pressing against the camera. Short, electrical pulses
that you cannot feel that are tiny and harmless will stimulate an
electronic emission in each fingertip to measure the energy or “glow”
produced. The GDV technology captures this image without needing any
special preparations or lighting.
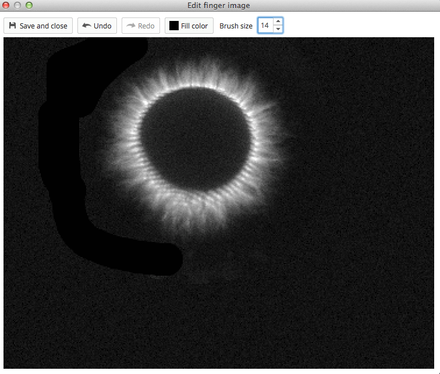
A successful capture will provide a green checkmark. A red exclamation mark indicates either an incomplete capture or excess light was present. While an incomplete capture requires the finger to be repositioned for a second attempt, excess light, presented as flares or particles outside the ring, may be “cleaned” by clicking on the Finger’s Edit button to use the eraser tool to remove the surrounding artifacts. Be sure to not interfere with the main image (ring).
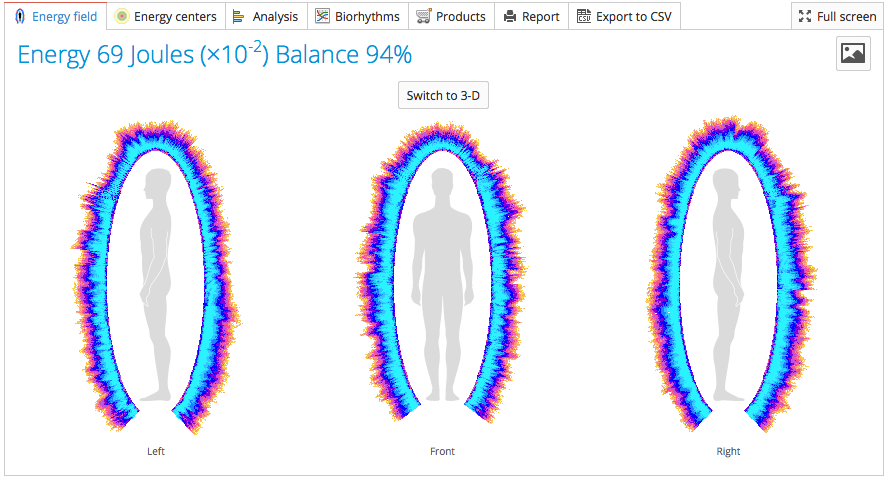
Notes may be added now, or at a later time. Once all 10 finger captures have been successfully completed, click Next and repeat the process, then click Analysis to submit the images to the server for processing. This stage will be confirmed as complete by the appearance of the Energy Field window displaying 3 views of the HEF
A successful capture will provide a green checkmark. A red exclamation mark indicates either an incomplete capture or excess light was present. While an incomplete capture requires the finger to be repositioned for a second attempt, excess light, presented as flares or particles outside the ring, may be “cleaned” by clicking on the Finger’s Edit button to use the eraser tool to remove the surrounding artifacts. Be sure to not interfere with the main image (ring).
Notes may be added now, or at a later time. Once all 10 finger captures have been successfully completed, click Next and repeat the process, then click Analysis to submit the images to the server for processing. This stage will be confirmed as complete by the appearance of the Energy Field window displaying 3 views of the HEF
Human Energy Field Windows
Presentation of front and side views of the entire HEF created in accordance with the meridian principle of the Tradicional Chinese Medicine (TCM) (fig.6). Energy index evaluates the energy of photons emitted by fingers in Joules. Balance index evaluates left/right balance of the body.
Left-clicking an area will enlarge the view in a separate window. 3D mode is available if the computer’s graphics resources (video card/memory) are capable of rendering the image
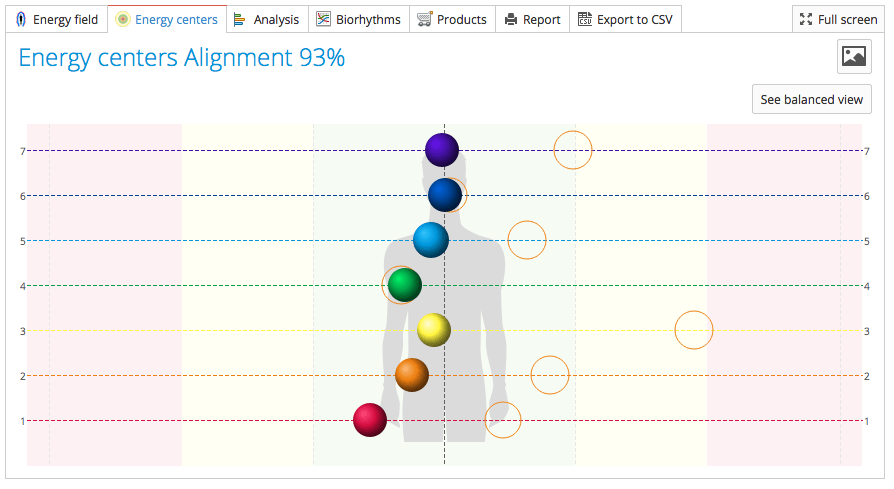
Energy Centers
This screen represents the position of 7 main energy centers of the
body in accordance with the ideas of Indian Ayurvedic medicine.
Alignment index evaluate averaged position of the centers against the
central line. You may see balanced view.
Analysis
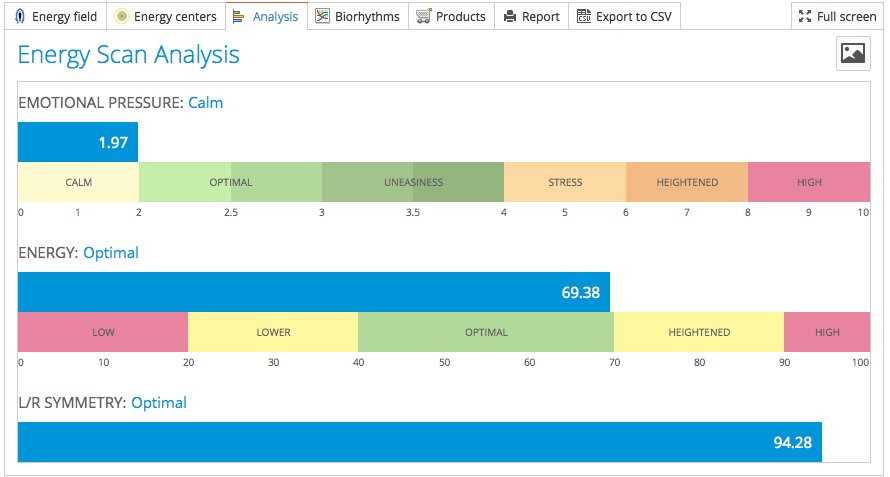
The three main parameters – Emotional pressure, Energy and L/R symmetry – as numeric results.
The three main parameters – Emotional pressure, Energy and L/R symmetry – as numeric results.
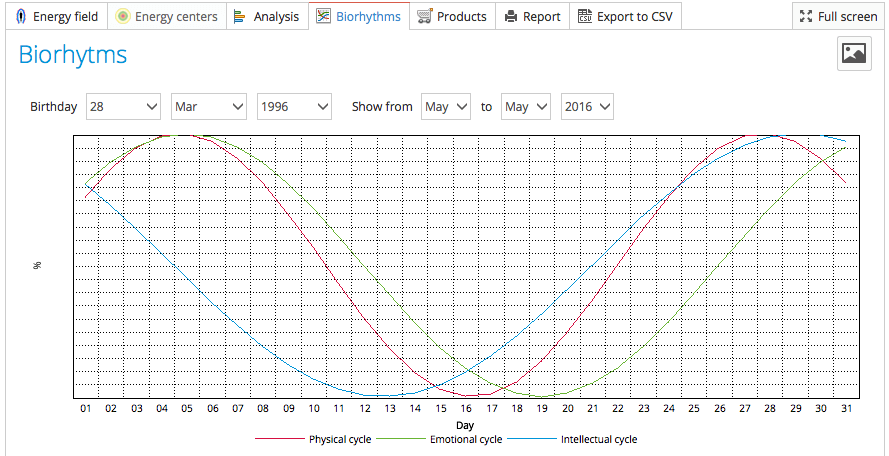
Biorhythms
Presents three main the biorhythms for the chosen period of time
Presents three main the biorhythms for the chosen period of time
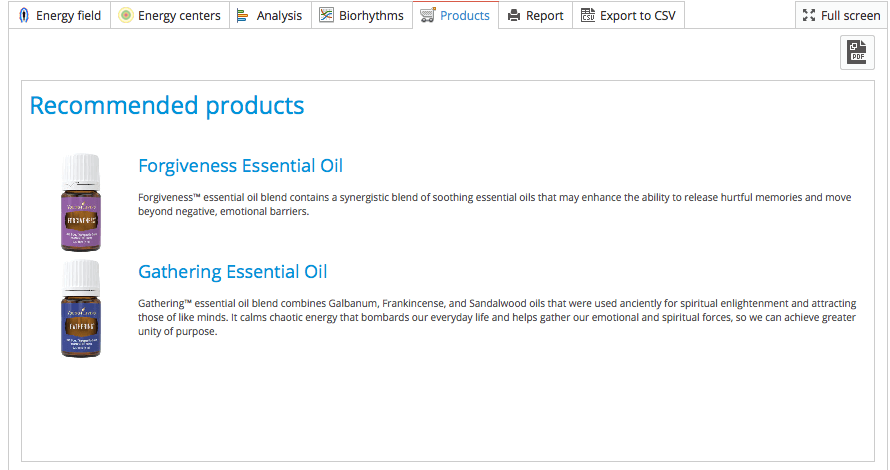
Products
Generates a list of products created by sophisticated software based on the results of your measurements
Generates a list of products created by sophisticated software based on the results of your measurements
Report
Prepares a PDF file containing descriptions of the main parameters. Comments, recommendations and pictures may be added, and all included information is customizable for corrections and omissions.
Export to CSV
Allows for saving the main parameters in CSV format for further processing in Excel, Statistics and other similar programs. Fractional numbers are presented using the European style – with a comma separating the integer and decimal portions of the number. It may be necessary to enable European settings within the program to view the data correctly.
Tension Mode
This mode enables readings from two fingers to produce an analysis of the 3 main parameters. Typically, the Ring fingers (4L and 4R) are used for this scan. However, the use of other fingers is optional. As a result of this test the scales of the Emotional pressure, Energy and L/R symmetry will be presented.
Scan Management – what else you see on the screen
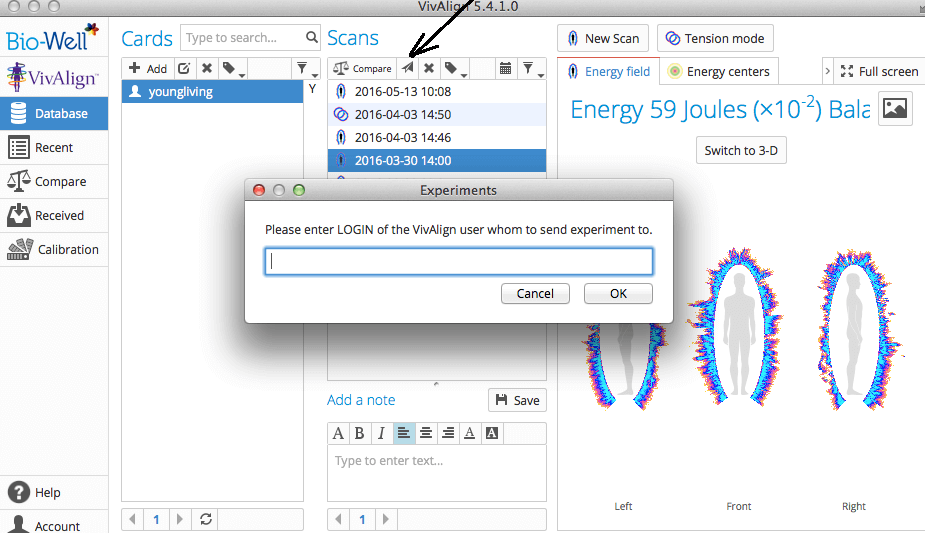
Within the main window, in the Scans column, you will see readings taken for the chosen card with date and time of recording. Each individual reading, listed in the Scans column, may be opened for review, deleted or sent to another account. Sending scans between accounts requires the exact spelling of the Login (username) of the destination account.
Prepares a PDF file containing descriptions of the main parameters. Comments, recommendations and pictures may be added, and all included information is customizable for corrections and omissions.
Export to CSV
Allows for saving the main parameters in CSV format for further processing in Excel, Statistics and other similar programs. Fractional numbers are presented using the European style – with a comma separating the integer and decimal portions of the number. It may be necessary to enable European settings within the program to view the data correctly.
Tension Mode
This mode enables readings from two fingers to produce an analysis of the 3 main parameters. Typically, the Ring fingers (4L and 4R) are used for this scan. However, the use of other fingers is optional. As a result of this test the scales of the Emotional pressure, Energy and L/R symmetry will be presented.
Scan Management – what else you see on the screen
Within the main window, in the Scans column, you will see readings taken for the chosen card with date and time of recording. Each individual reading, listed in the Scans column, may be opened for review, deleted or sent to another account. Sending scans between accounts requires the exact spelling of the Login (username) of the destination account.
Scans are listed by date and time with types easily identified by the
icon corresponding to the scan modes listed at the top-right of the
main window – Full or Tension mode.
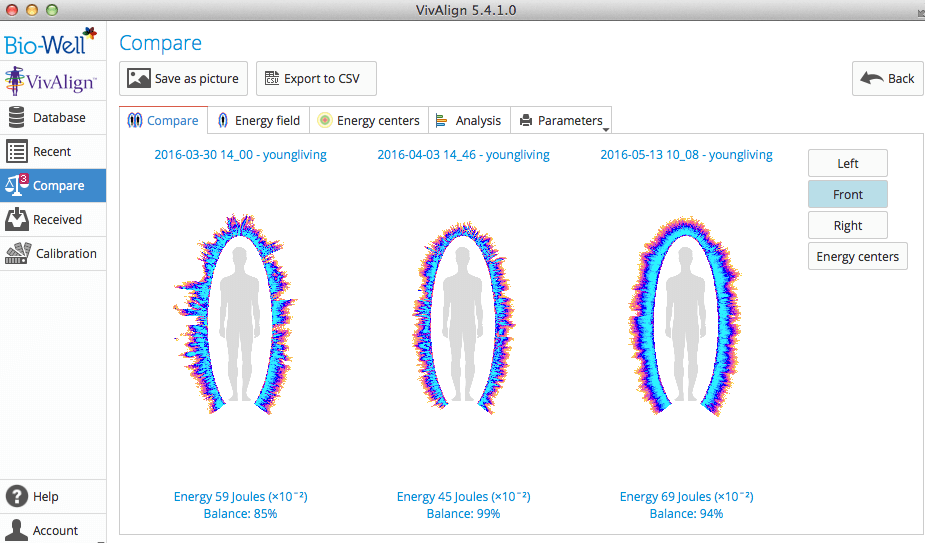
The Compare button will send a chosen scan to the compare compartment. A small, red number will appear to indicate how many cases are selected. Up to 50 scans, from the same or different Cards, may be compared at one time.
Left-Side Panel
This is the location of the following options: DATABASE, RECENT, COMPARE, RECEIVED, and CALIBRATION.
DATABASE: Returns to the main Database screen from any process.
RECENT: Displays the most recent scans.
RECEIVED: Shows scans received from other users.
COMPARE: Allows for comparison of up to 50 scans and saves the parameters as a CSV file .